
25 Easy-to-Achieve Wedding Toes That Will Wow Your Guests
Getting ready for your big day? Look no further! In this article, we’re diving into “25 Wedding Toes [Easy to Achieve],” showcasing fabulous nail designs that are not only stunning but super simple to pull off.
Whether you’re a DIY diva or prefer to visit a salon, these trendy toe ideas will ensure your feet are just as picture-perfect as the rest of you on your special day!
1. What Are Wedding Toes?
Wedding toes refer to the stylish and often intricate nail designs brides and bridesmaids choose to complement their wedding looks. These designs add a fun touch to the overall bridal aesthetic. Here’s what you need to know:
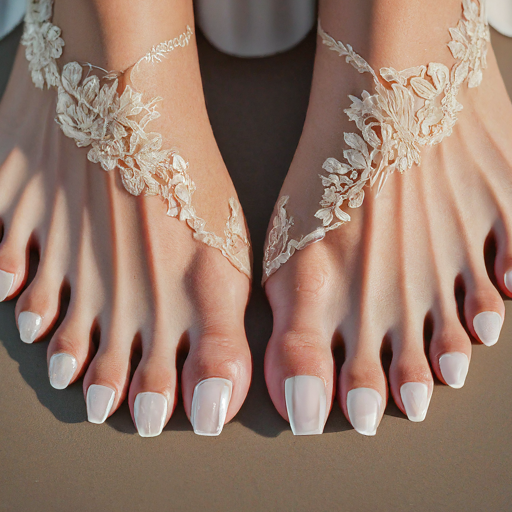
- Nail Art: Wedding toes often feature nail art that matches the wedding theme. Think floral patterns, lace designs, or even sparkly accents.
- Color Palette: Popular colors include whites, pastels, and metallics. The choice usually aligns with the wedding’s color scheme.
- Textures: Many brides opt for textured nails using matte finishes, glitter, or glossy topcoats. These textures create an eye-catching effect.
- Length & Shape: The nail length and shape can vary. Some prefer longer, almond-shaped nails, while others go for a shorter, more practical look.
Popular Styles
- French Tips: A classic choice. The tips are painted white while the rest of the nail remains a soft pink or nude.
- Floral Designs: Hand-painted flowers can add a romantic touch. Use tiny blossoms or larger blooms for a bolder look.
- Geometric Patterns: For a modern twist, geometric designs can incorporate bold lines and contrasting colors.
- Glitter Ombre: This style transitions from a solid color at the base to glittery tips, adding sparkle without overwhelming the design.
- Nude with Accents: A nude base with a few accent nails featuring intricate designs or gems can be both classy and understated.
Nail Care
To achieve stunning wedding toes, proper nail care is essential:
- Pre-Wedding Prep: Schedule a pedicure a week before the big day. This allows time for any adjustments.
- Moisturize: Keep your feet and nails hydrated. Dry skin can detract from the overall look.
- Choose Quality Products: Use high-quality nail polish for a long-lasting finish. Look for options that resist chipping.
Wedding toes play a crucial role in completing the bridal look. They reflect personal style and add a special touch to the celebration.
2. The Importance of Wedding Toes
When it comes to your big day, every detail counts. Wedding toes might seem like a small part of the overall picture, but they play a crucial role. Here’s why they matter:
- Completeness of the Look: Your wedding outfit isn’t just about the dress. Shoes and toes complete your overall appearance. Well-groomed toes enhance your confidence and make you feel put together.
- Photo Worthiness: Wedding photos capture memories for a lifetime. You’ll want every aspect to shine, including your toes. Whether you’re barefoot on the beach or in stunning heels, polished toes look great in close-up shots.
- Comfort Matters: Your wedding day can stretch on for hours. Comfortable and well-cared-for feet help you enjoy every moment without distraction. Soft skin and neat nails can make a difference in how you feel throughout the day.
- Symbol of Care: Taking the time to pamper your toes shows attention to detail. It reflects the effort you put into your wedding preparations. Guests will notice your polished look and appreciate the thoughtfulness behind it.
Quick Tips for Wedding Toes
- Regular Pedicures: Schedule regular pedicures leading up to the wedding. This keeps your toenails trimmed and skin soft.
- Moisturize: Daily moisturizing helps combat dryness, ensuring your feet look fresh.
- Nail Art: Consider fun designs or a simple polish that matches your wedding colors.
- Footwear Prep: Break in your wedding shoes. This prevents blisters and makes sure your feet feel great.
- Emergency Kit: Keep an emergency kit with band-aids and a nail file handy for any last-minute fixes.
Remember, wedding toes are about self-care and aesthetic appeal. They help you feel fabulous and confident as you celebrate your love.
3. Choosing the Right Nail Color
Choosing the right nail color for your wedding toes can elevate your entire look. Here are some tips to help you pick the perfect shade.
Consider Your Wedding Theme
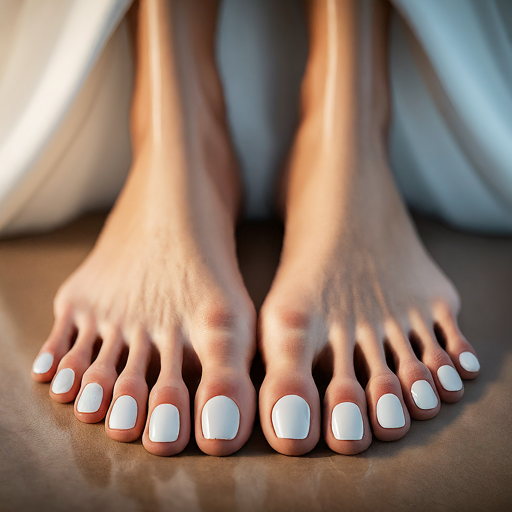
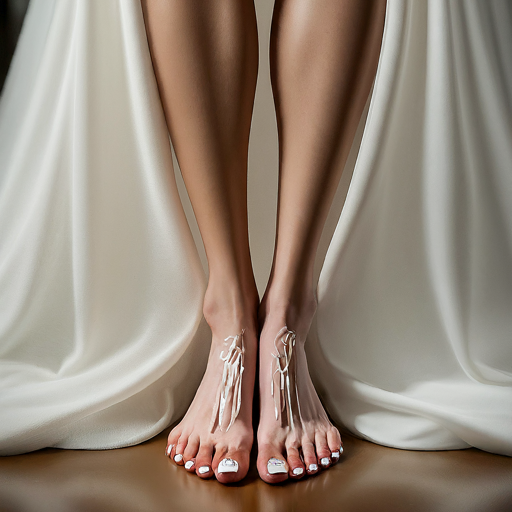
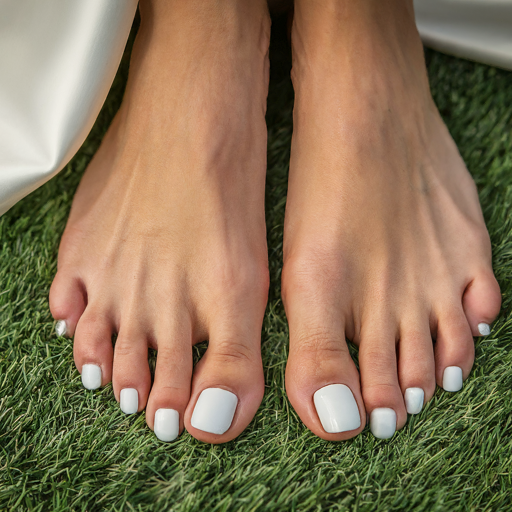
- Classic White: A timeless choice that complements any outfit.
- Soft Pastels: Perfect for a romantic or vintage theme. Think blush pink or baby blue.
- Bold Colors: Go for reds or deep purples if you want to make a statement.
Match with Your Dress
Your nail color should complement your wedding dress. Consider these options:
- Neutral Shades: If your dress is detailed or has patterns, stick to nude or light shades.
- Accent Colors: If your dress has a specific color, match your nails to that. It creates a cohesive look.
- Metallics: Gold or silver nails shine beautifully against white or ivory dresses.
Skin Tone Matters
Your skin tone plays a big role in nail color selection. Check out these combinations:
- Fair Skin: Light pinks, soft corals, and pastel shades look great.
- Medium Skin: Try deep pinks, peach, or warm reds.
- Dark Skin: Bold colors like fuchsia, purple, or bright orange pop beautifully.
Keep Your Comfort in Mind
Choose a color you feel comfortable with. You want to enjoy your day without worrying about your toes. If you typically wear bright colors, go for it. If you prefer more natural looks, stick to nude or soft tones.
Nail Art Options
If you want to add some flair, consider subtle nail art:
- Accent Toe: Paint one toe a different color or add a small design.
- Glitter Top Coat: Add a layer of sparkle for a fun touch.
- French Tip: A classic look that never goes out of style.
Final Thoughts
Test a few shades before the big day. Apply different colors and see what feels right. Your wedding toes should reflect your personality and style. Enjoy the process and have fun with it!
4. Simple Nail Art Ideas
Nail art can elevate your wedding look without breaking the bank. Here are some easy ideas to get you started:
- Polka Dots
Use a dotting tool or a toothpick to create polka dots. Choose colors that match your wedding theme. This style adds a playful touch. - French Tips with a Twist
Give the classic French manicure a modern spin. Instead of white tips, use pastel or metallic shades. This adds elegance and uniqueness. - Stripes
Use striping tape to create straight lines. You can go for bold colors or keep it subtle with nude and gold. This design looks chic and polished. - Floral Accents
Paint tiny flowers on a couple of accent nails. Use a small brush for precision. This adds a romantic vibe perfect for weddings. - Glitter Gradient
Apply a glitter polish at the tips of your nails and blend it down for a gradient effect. This sparkly look catches the light beautifully. - Geometric Designs
Use tape to create shapes like triangles or chevrons. Play with contrasting colors for a modern aesthetic or stick to one color for a minimalist look. - Negative Space
Leave parts of your nails unpainted for a trendy look. Use tape to block off areas before painting. This style is chic and effortlessly cool. - Ombre Effect
Blend two colors for a stunning ombre effect. Use a makeup sponge to dab the colors together for a seamless transition.
Tips for Success
- Keep It Simple: Choose one or two nails for intricate designs. The rest can be solid colors.
- Practice: Try your designs on fake nails before the big day.
- Use Quality Products: Invest in good nail polish and topcoat for lasting results.
- Consider Your Dress: Make sure your nail art complements your wedding dress and overall look.
These simple nail art ideas let you express your style while keeping things easy to achieve.
5. Preparing Your Toes for the Big Day
Getting your toes ready for the big day is just as important as choosing the perfect dress. Follow these steps to ensure your feet look fabulous and feel comfortable.
1. Pamper Your Feet
Treat your feet to a spa day. Soak them in warm water with Epsom salt for about 15-20 minutes. This helps relax your muscles and softens your skin. After soaking, gently scrub your feet to remove dead skin.
2. Shape and Trim
Give your toenails a good trim. Cut them straight across to prevent ingrown nails. Use a nail file to smooth any sharp edges. Don’t forget to push back your cuticles for a polished look.
3. Moisturize
Apply a rich moisturizer to your feet. Focus on dry areas like heels and the sides of your toes. This step keeps your skin hydrated and looking fresh. For an extra touch, consider using a foot cream with essential oils.
4. Choose the Right Polish
Pick a nail polish color that complements your wedding theme. Here are some popular choices:
- Classic French Manicure: Timeless and elegant.
- Pastels: Soft hues like blush or lavender add a romantic touch.
- Bold Colors: Bright reds or deep blues can make a statement.
Apply a base coat to protect your nails before adding color. Finish with a top coat for a glossy shine and added durability.
5. Try Some Nail Art
If you’re feeling creative, add some nail art. Simple designs like dots, stripes, or floral patterns can elevate your look. Just ensure the design matches your overall wedding aesthetic.
6. Think About Comfort
Wedding day activities can put a strain on your feet. Choose comfortable shoes that fit well and provide support. If you’re set on heels, consider a lower height or platform shoes for added comfort.
7. Keep a Touch-Up Kit Handy
Pack a small kit with nail polish, a nail file, and a quick-dry spray. This kit helps you fix any chips or imperfections throughout the day.
Taking these steps helps your toes look stunning and ensures you can dance the night away without discomfort.
6. Step-by-Step Nail Care Routine
Keeping your wedding toes looking fabulous requires a simple nail care routine. Follow these easy steps to achieve healthy and beautiful nails.
Step 1: Gather Your Supplies
- Nail clipper
- Nail file
- Cuticle pusher
- Moisturizing lotion
- Nail polish remover
- Base coat and top coat
- Nail polish (your favorite color)
Step 2: Prep Your Toes
- Soak your feet in warm, soapy water for about 10 minutes. This softens the nails and cuticles.
- Gently dry your feet with a towel.
Step 3: Trim and File
- Use the nail clipper to trim your toenails straight across. Avoid rounding the edges to prevent ingrown nails.
- Smooth the edges with a nail file. This keeps your nails from snagging.
Step 4: Care for Your Cuticles
- Push back your cuticles gently using a cuticle pusher. Don’t cut them; just nudge them back.
- Apply a bit of moisturizing lotion to your cuticles to keep them soft.
Step 5: Clean Your Nails
- Use nail polish remover to wipe off any old polish and clean the surface of your nails.
Step 6: Apply Base Coat
- Apply a thin layer of base coat. This protects your nails and helps the polish stick better.
Step 7: Polish Away
- Choose your favorite nail polish color. Apply two to three thin coats for an even finish. Let each coat dry before adding the next.
Step 8: Finish with a Top Coat
- Seal your color with a top coat. This adds shine and protects against chips.
Step 9: Moisturize
- Once your nails are dry, massage a good moisturizing lotion into your feet. This keeps your skin soft and smooth.
Step 10: Maintenance
- Repeat this routine every two weeks. Keep your nails trimmed and polished for that perfect wedding look.
Follow these steps, and you’ll keep your wedding toes looking stunning. Enjoy the process and pamper yourself!
7. DIY Pedicure Tips
Getting your toes ready for your big day doesn’t have to be complicated. Here are some quick and easy DIY pedicure tips to help you achieve gorgeous wedding toes.
Gather Your Supplies
Before you start, grab these essentials:
- Nail polish remover
- Cotton balls or pads
- Nail clippers
- Nail file
- Pumice stone or foot file
- Moisturizer
- Base coat and top coat
- Nail polish (your favorite color)
Step-by-Step Guide
- Prep Your Feet
- Soak your feet in warm water for about 10-15 minutes. Add Epsom salt or essential oils for an extra treat.
- Use a pumice stone to gently scrub away dead skin. Focus on heels and rough spots.
- Trim and Shape Nails
- Clip your nails straight across to avoid ingrown nails.
- File the edges for a smooth finish. Round the tips slightly for a natural look.
- Clean Up
- Use nail polish remover to wipe away any residue on your nails.
- Push back cuticles with a cuticle stick. Don’t forget to moisturize them afterward.
- Apply Base Coat
- Apply a thin layer of base coat. This helps the polish stick and prevents staining.
- Paint Your Nails
- Apply two coats of your chosen nail polish. Allow each coat to dry before applying the next.
- If you want a little sparkle, consider adding glitter polish on top.
- Seal with Top Coat
- Finish with a top coat to add shine and protect your polish. This step helps your pedicure last longer.
- Moisturize Your Feet
- Apply a rich moisturizer to keep your feet soft and hydrated. Focus on the heels and dry areas.
Quick Maintenance Tips
- Exfoliate your feet weekly to keep them smooth.
- Reapply nail polish every few days to maintain the look.
- Keep a small bottle of nail polish for touch-ups on the day of your wedding.
With these simple DIY pedicure tips, you’ll have beautiful wedding toes that shine on your special day!
8. Best Products for Wedding Toes
Achieving picture-perfect wedding toes is easier with the right products. Here’s a list of must-haves to make your toes look stunning on your big day.
Nail Care Essentials
- Nail File: A good nail file shapes your nails and gives them a polished look.
- Cuticle Oil: Hydrate your cuticles with this oil. It keeps them soft and healthy.
- Base Coat: Protect your nails from stains and enhance polish longevity with a quality base coat.
Polish Picks
- High-Quality Nail Polish: Choose a long-lasting, chip-resistant formula. Brands like OPI, Essie, and Zoya offer a variety of wedding-friendly shades.
- Top Coat: A glossy top coat adds shine and helps your polish last longer. Look for quick-drying options.
Foot Care Products
- Exfoliating Scrub: Use a scrub to remove dead skin. Focus on heels and soles for smooth feet.
- Moisturizing Cream: Keep your feet hydrated. Apply a rich cream before bed for soft, supple skin.
- Foot Mask: Treat your feet with a hydrating foot mask a few days before the wedding for a pampered feel.
Accessories
- Toe Separators: These help keep your toes apart while painting. They prevent smudging and ensure even polish application.
- Nail Art Stickers: Add a fun touch with nail art stickers. They can elevate your toe game without much effort.
Bonus Tips
- Sunscreen: Protect your feet from sunburn if you’ll be outdoors. Apply sunscreen on your feet and ankles.
- Comfortable Shoes: Choose shoes that complement your wedding attire while keeping your feet comfortable. This ensures you can dance the night away without pain.
Investing in these products makes your wedding toes shine. Enjoy the process and rock those beautiful feet on your special day!
9. How to Maintain Your Wedding Toes
Keeping your wedding toes looking fabulous takes a little effort. Follow these tips to maintain that perfect pedicure and keep your feet feeling great.
Regular Maintenance
- Weekly Pedicures: Treat yourself to a pedicure at least once a week. You can DIY or visit a salon. Either way, keep those nails trimmed and shaped.
- Moisturize Daily: Apply foot cream every day. Focus on your heels and cuticles to prevent dryness and cracking.
Nail Care Tips
- Choose the Right Polish: Use high-quality nail polish. Look for formulas that resist chipping and fading.
- Base and Top Coats: Always apply a base coat to protect your nails. Finish with a top coat for shine and durability.
- Avoid Dark Colors: Dark shades can stain your nails. Stick to lighter colors or clear polish for a fresh look.
Foot Health
- Foot Soaks: Soak your feet in warm water with Epsom salt weekly. This relaxes your muscles and softens your skin.
- File Away Rough Skin: Use a foot file on areas that feel rough. Focus on the heels and balls of your feet.
Protect Your Toes
- Wear Comfortable Shoes: Avoid tight shoes that pinch your toes. Opt for comfortable styles, especially if you’re on your feet all day.
- Use Foot Powder: Prevent moisture and odor by using foot powder. This keeps your feet fresh, especially during warm weather.
Nail Growth
- Healthy Diet: Eat a balanced diet rich in vitamins and minerals. Vitamins A, C, and E promote nail strength.
- Stay Hydrated: Drink plenty of water. Hydration contributes to healthier skin and nails.
Quick Fixes
- Emergency Kit: Keep a small kit with nail polish, a nail file, and cuticle oil handy for quick touch-ups.
- Avoid Biting Nails: Break the habit of biting your nails. This can lead to damaged cuticles and uneven growth.
By following these tips, you can keep your wedding toes looking stunning and feeling great throughout your special day and beyond.
Trending Toe Designs for 2023
Looking to add some flair to your wedding day? Check out these trending toe designs for 2023. They’re stylish, fun, and easy to achieve.
- Floral Nail Art
Floral designs never go out of style. Choose delicate flowers or bold blooms. You can mix colors or stick to pastels for a soft look. - Geometric Patterns
Geometric shapes create a modern vibe. Try triangles, stripes, or dots in contrasting colors. This look catches the eye and adds sophistication. - Metallic Accents
Shine bright with metallic polish. Gold, silver, or rose gold can elevate your toe game. Use it as an accent or go all out for a glam look. - Ombre Effects
Ombre designs blend colors beautifully. Start with a light shade at the base and gradually deepen the color towards the tip. Perfect for a subtle yet chic style. - Glitter Glam
Sparkle is always in. Add glitter polish or use glitter as a topcoat. It catches the light and gives a festive feel, ideal for weddings. - Matte Finishes
Matte nails offer a sleek, contemporary look. Pair with bold colors for a striking contrast. It’s a trendy option that stands out without being too flashy. - Nude with a Twist
Nude shades keep it classy. Add a twist with unique nail art or a shiny topcoat. This gives a polished finish without overwhelming your toes. - Animal Prints
For the adventurous, animal prints are on-trend. Leopard spots or zebra stripes can make a statement. Go for subtle colors or vibrant hues to match your wedding theme. - Abstract Art
Get creative with abstract designs. Mix colors and shapes for a unique look. This allows you to express your personality and style. - Classic French Tips
The French tip never goes out of fashion. Update it with colored tips or a twist on the traditional white. It’s timeless and works with any wedding theme.
These designs keep your toes looking fabulous on your special day. Choose one or mix a few to create a look that’s uniquely yours.
11. Celebrity Wedding Toe Inspirations
Celebrities often set trends, and their wedding toes are no exception. Here are some stunning celebrity wedding toe inspirations that you can easily replicate for your big day.
1. Kate Middleton
- Style: Classic nude polish
- Look: Simple and elegant, perfect for a royal touch.
2. Kim Kardashian
- Style: Glittery gold
- Look: Adds glam and sparkle, great for a high-fashion vibe.
3. Blake Lively
- Style: Bold red
- Look: Timeless and striking, a must-have for the confident bride.
4. Meghan Markle
- Style: Natural look
- Look: Minimalistic and chic, ideal for a subtle elegance.
5. Jessica Biel
- Style: Soft pink
- Look: Romantic and sweet, perfect for a dreamy wedding.
6. Priyanka Chopra
- Style: Metallic silver
- Look: Futuristic and edgy, perfect for a modern twist.
7. Reese Witherspoon
- Style: Bright coral
- Look: Fun and vibrant, great for a summer wedding.
8. Ariana Grande
- Style: Pastel lavender
- Look: Whimsical and playful, perfect for a fairy-tale theme.
9. Ciara
- Style: Ombre effect
- Look: Unique and artistic, great for the creative bride.
10. Nicole Richie
- Style: Bold black
- Look: Edgy and sophisticated, perfect for a non-traditional wedding.
11. Emma Stone
- Style: Classic French tips
- Look: Elegant and timeless, a safe choice for any style.
These celebrity inspirations show how you can express your style through your wedding toes. Choose a look that resonates with you, and make it your own!
12. Frequently Asked Questions About Wedding Toes
What Are Wedding Toes?
Wedding toes refer to the nail art and pedicure styles brides choose for their special day. They complement the overall wedding look and often match the wedding theme.
Why Are Wedding Toes Important?
Wedding toes add a polished touch. They enhance your overall appearance, especially if you wear open-toe shoes. Guests will notice your feet, so why not make them look fabulous?
How Do I Choose the Right Style?
- Consider Your Dress: Match the nail color or style with your dress.
- Think About the Theme: Use colors that reflect your wedding theme.
- Personal Preference: Choose a design that feels like you.
When Should I Get My Wedding Toes Done?
Aim for a few days before your wedding. This timing ensures your pedicure looks fresh without risking chips or fading.
Can I Do My Wedding Toes Myself?
Absolutely! If you’re comfortable, follow these simple steps:
- Soak your feet.
- Trim and file your nails.
- Exfoliate and moisturize.
- Apply a base coat, color, and top coat.
What Colors Work Best for Wedding Toes?
- Classic White: Timeless and elegant.
- Soft Pastels: Light pinks, blues, or lavenders add a romantic touch.
- Bold Colors: Bright reds or deep blues can make a statement.
How Much Should I Expect to Spend?
Costs vary based on location and style. A basic pedicure ranges from $30 to $60, while intricate designs can go up to $100 or more.
How Long Does a Pedicure Last?
Typically, a well-done pedicure lasts about two weeks. Regular touch-ups help maintain the look.
What About Nail Art?
Consider simple designs like:
- Floral patterns
- Glitter accents
- Rhinestones
Are There Any Foot Care Tips?
- Keep feet moisturized.
- Exfoliate regularly.
- Avoid tight shoes leading up to the wedding.
Can I Have Matching Wedding Toes with My Bridesmaids?
Definitely! Coordinating colors or designs with your bridesmaids can create a cohesive look. It’s fun and makes for great photo opportunities.
Conclusion
Wedding toes deserve just as much attention as the rest of your bridal look. With these 25 easy-to-achieve styles, you can express your personality and add a touch of fun to your big day. Whether you prefer a classic look or want to show off vibrant colors and creative designs, there’s a toe style that fits your vision perfectly.
Remember to choose a design that complements your overall wedding theme. Prioritize comfort and confidence when selecting your nail art. Enjoy the process of getting your wedding toes ready and make them a memorable part of your celebration. Happy styling!


